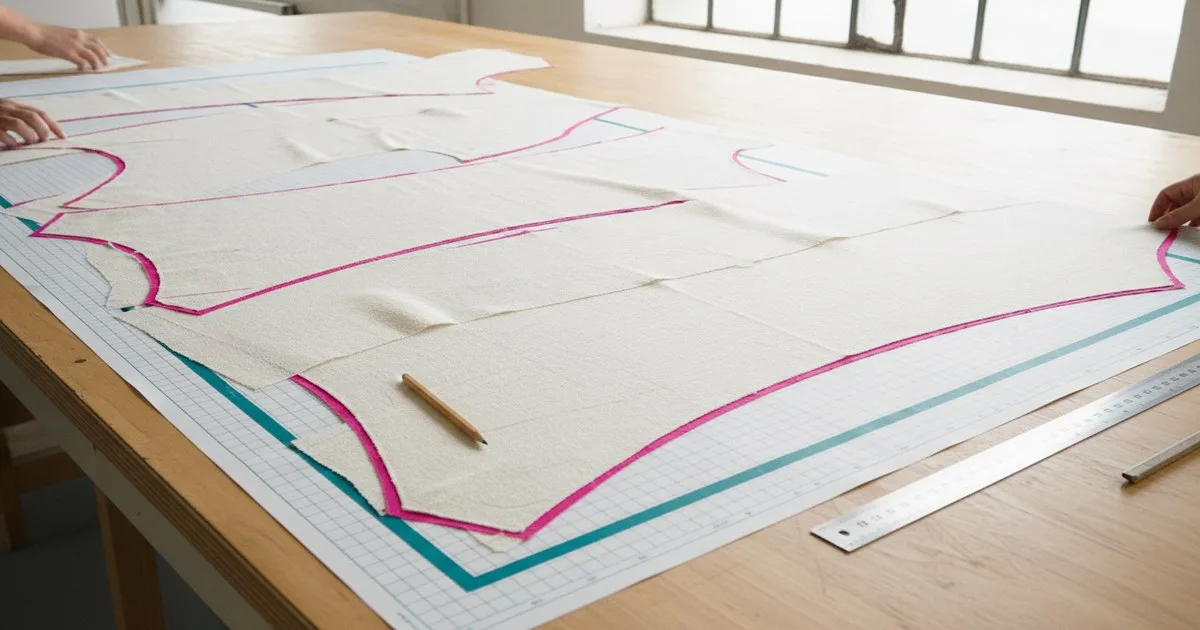
Fabric yield is the amount of usable fabric consumed per finished garment, expressed as yards (or metres) per unit. Because fabric typically accounts for the largest single share of a garment's first cost, a yield figure that is even slightly off will compound across a production run and turn a profitable style into a loss. If you can calculate yield yourself — from a marker plan or from basic pattern data — you can cross-check every factory quote before it becomes a purchase order.
Key takeaways
- Fabric yield is usable fabric per garment unit; it is distinct from total yardage purchased and must account for marker efficiency and wastage.
- Because fabric is usually the dominant cost component in a garment, small yield errors translate directly into significant cost inaccuracies at scale.
- You can derive a working yield figure from a marker plan without waiting for the factory: divide total marker area by the number of garments in the marker, then adjust for fabric width.
- Marker efficiency — the percentage of fabric actually covered by pattern pieces — is the key variable that connects yield to real-world cost.
- Locking yield into your BOM early lets you audit incoming factory quotes against your own benchmark and catch discrepancies before sampling.
What exactly is fabric yield in garment production?
Yield, in the context of garment costing, is the quantity of fabric required to cut one finished unit of a specific style, in a specific fabric width, at a specific size ratio. It is not a fixed property of a style — it changes when the fabric width changes, when the size mix changes, or when the marker layout changes.
The term is sometimes used loosely to mean total fabric consumption per order, but for costing purposes you need yield per unit: a single number you can multiply by fabric price per yard to get your fabric cost per garment.
Fabric cost per garment = yield (yards/unit) × fabric price ($/yard)
That calculation is deceptively simple. The difficulty is getting an accurate yield figure in the first place, and understanding what drives it up or down.
Why fabric yield drives first cost more than any other variable
In most woven or knit garments, fabric accounts for the largest portion of the direct material cost. A detailed breakdown of a T-shirt's cost illustrates the point clearly: fabric dominates the material bill, and the guidance is explicit that to get a precise number, you must calculate fabric yield per style rather than relying on category averages.
That matters because factories often quote fabric consumption using internal benchmarks or historical averages that may not reflect your specific pattern shapes, your size run, or your fabric width. A factory quoting 1.8 yards per unit when your marker analysis shows 1.6 yards is effectively building a 12% fabric buffer into the price — buffer that you are paying for.
At 10,000 units and a fabric price of $4.00 per yard, that 0.2-yard difference is $8,000. At 50,000 units it is $40,000. Catching it early is not a minor administrative win; it is a meaningful cost recovery.
How marker efficiency connects to yield
A marker is the layout of all the pattern pieces for a style, arranged on a virtual or physical roll of fabric to minimise waste. Marker efficiency is the percentage of the total marker area that is actually covered by pattern pieces — the rest is inter-piece waste, selvedge waste, and end loss.
Marker efficiency (%) = (total pattern piece area ÷ total marker area) × 100
A well-optimised marker for a simple style might reach 85–90% efficiency. Complex shapes, directional prints, or nap fabrics can push efficiency below 75%, which means more than a quarter of every yard you buy becomes waste.
Yield and marker efficiency are directly linked:
Yield (yards/unit) = total marker length (yards) ÷ number of units in the marker
If a marker for 12 units of a blouse runs 14.4 yards at 58-inch fabric width, yield is 1.2 yards per unit. If the factory re-lays the marker less efficiently and it runs 15.6 yards, yield becomes 1.3 yards per unit — and your fabric cost per garment rises accordingly.
How to calculate fabric yield from a marker plan: step by step
What you need before you start
- A completed marker plan (digital or printed), showing total marker length and the number of garment units nested
- Fabric width (usable width, not nominal roll width — account for selvedge)
- The size ratio for the marker (e.g., 2S / 4M / 4L / 2XL)
- Fabric price per yard at the specified width
Step 1 — Confirm usable fabric width
Never use the nominal roll width. Selvedges, dye borders, and tension distortion typically reduce usable width by 1–3 inches. Ask your mill for the confirmed usable width, or measure from your lab dip sample. Record this as your working width.
Step 2 — Read total marker length
From the marker plan, read the total length of the marker in yards (or convert from centimetres: divide by 91.44). This is the length of fabric consumed to cut all the units in that marker.
Step 3 — Calculate raw yield per unit
Divide total marker length by the number of units in the marker:
Raw yield = marker length ÷ units in marker
Example: 18 yards ÷ 12 units = 1.5 yards per unit
Step 4 — Add end allowance
Every cut spread has end loss — fabric at the start and end of each ply that cannot be used. A standard allowance is 2–4 inches per ply end; for a typical spread of 60 plies, that can add 0.05–0.1 yards per unit depending on the number of splices. Confirm the spread length and ply count with your cutting room.
Adjusted yield = raw yield + end allowance per unit
Step 5 — Add a shrinkage allowance if applicable
If the fabric requires pre-shrinking or if the garment is washed after sewing, add a shrinkage factor. For a fabric with 3% warp shrinkage, multiply adjusted yield by 1.03.
Final yield = adjusted yield × (1 + shrinkage %)
Step 6 — Calculate fabric cost per unit
Multiply final yield by fabric price per yard:
Fabric cost per unit = final yield × price per yard
Enter this figure into your BOM costing sheet. If you are using tech pack software such as Techpacker, the costing sheet sits alongside your materials and measurements pages, so yield, unit cost, and total fabric cost stay in one document that travels with the tech pack through sampling and production.
Step 7 — Compare against the factory quote
Request the factory's stated consumption figure. If it differs from your calculated yield by more than 5%, ask for their marker plan. Discrepancies above that threshold are almost always explainable — different size ratio, different fabric width, or a less efficient marker — and each explanation has a different commercial implication.
Where yield calculations go wrong
Width mismatch. A yield calculated at 58-inch width is not valid at 54-inch width. If the factory sources a narrower roll, yield rises. Always state the fabric width in your BOM alongside the yield figure.
Size ratio changes. Larger sizes consume more fabric. A marker built for a 1:2:2:1 (S/M/L/XL) ratio will produce a different yield than one built for a 1:1:3:1 ratio. If your order ratio shifts between development and production, recalculate.
Directional and repeat fabrics. Stripes, plaids, and prints with a repeat require pattern pieces to be aligned, which reduces marker efficiency significantly. Fabric yield calculation guides flag this as one of the most common sources of underestimated consumption: repeat matching can add 10–20% to yield depending on repeat size and pattern placement.
Shrinkage not accounted for. Woven fabrics that shrink in finishing, or garments that are enzyme-washed or garment-dyed, need a shrinkage factor built into yield. Omitting it means the cut pieces arrive at sewing undersized or the finished garment falls outside tolerance.
Marker efficiency assumed rather than measured. Using an industry-average efficiency figure (say, 85%) without checking the actual marker is a common shortcut that introduces real error. CAD marker-making tools — including Gerber AccuMark, now part of Lectra's suite — report actual marker efficiency as part of the marker output, so you can read the real number rather than estimating it.
How to record yield in your BOM and tech pack
Yield belongs in the fabric row of your bill of materials, alongside fabric description, colour, width, and unit price. A well-structured BOM entry for a woven shell fabric might look like this:
| Field | Value |
|---|---|
| Material description | Shell fabric, 100% polyester twill |
| Colour / reference | Navy, PMS 2767 C |
| Usable width | 57 inches |
| Yield (yards/unit) | 1.45 |
| Unit price ($/yard) | 3.80 |
| Fabric cost per unit | 5.51 |
Keep the width and yield linked — if one changes, the other must be rechecked. A BOM that records yield without width is incomplete, because the yield figure is meaningless without knowing the fabric width it was calculated for.
For teams managing multiple styles and colourways, a PLM or ERP system that centralises BOM data — such as WFX — can hold the yield and width together at the style level and flag when a fabric substitution changes either variable. The Techpacker guide to building a bill of materials shows how a materials sheet and costing sheet work together inside a tech pack, with yield feeding directly into the cost summary.
What is still unsolved: the limits of yield calculation
Yield calculation from a marker plan is reliable — but it depends on having a marker plan. In early development, before patterns are graded and nested, you are working from estimates. Production teams we speak to commonly use a development yield (derived from a single-size marker or a rough area calculation) and then reconcile against the production marker once it is available. The gap between the two can be 5–10% on complex styles, which is enough to affect sourcing decisions if the fabric is expensive.
A second open problem is multi-fabric styles. A jacket with a shell, lining, interlining, and pocket bag fabric requires a separate yield calculation for each component, each at its own width and price. The total fabric cost is the sum of all component yields multiplied by their respective prices. Missing one component — or using a placeholder yield for interlining because it seemed minor — produces a cost that does not reflect reality.
Finally, yield figures calculated during development are not always updated when the factory changes the marker for production efficiency. If the factory improves marker efficiency and does not pass the saving through, you will not know unless you request the production marker and recalculate.
FAQ
What is fabric yield in garment costing? Fabric yield is the quantity of fabric — in yards or metres — required to cut one finished garment unit. It accounts for marker efficiency, end loss, and shrinkage. Multiplied by the fabric price per yard, it gives you the fabric cost per unit, which is typically the largest single line in a garment's direct material cost.
How do I calculate fabric yield without a full marker? Estimate pattern piece area by measuring or calculating the area of each piece, sum them, and divide by an assumed marker efficiency (use a conservative figure such as 80% for complex shapes). Divide the result by usable fabric width in yards to get an approximate yield. Treat this as a development estimate and reconcile it against the actual marker before locking costs.
What is a good marker efficiency for woven garments? For simple shapes — basic tees, straight-cut trousers — well-optimised markers typically reach 85–90% efficiency. Fitted, curved, or asymmetric styles often land in the 78–85% range. Directional or repeat fabrics can fall below 75%. Actual efficiency is reported by CAD marker-making software and should always be read from the file rather than assumed.
Why does fabric width affect yield? A narrower fabric forces pattern pieces into a longer marker to fit, increasing the yards consumed per unit. If you calculate yield at 58-inch width and the factory sources 54-inch fabric, your yield figure is wrong and your cost will be understated. Always specify usable width in the BOM alongside the yield figure.
How do I use yield to audit a factory quote? Calculate your own yield from the marker plan, add your end and shrinkage allowances, and multiply by the fabric price. Compare the resulting fabric cost per unit to the factory's quoted fabric cost. A difference above roughly 5% warrants a request for the factory's marker plan and a conversation about the size ratio and fabric width they used.
Where does yield live in a tech pack? Yield belongs in the fabric row of the BOM, paired with usable width and unit price. Tech pack tools that include a costing sheet — such as Techpacker — let you record yield, width, and price in one place so the fabric cost per unit updates automatically when any variable changes.
Further reading
- Fabric yield: calculate and avoid waste in garment production
- Breakdown of a T-shirt cost: fabric, labour, overhead, margin
- The ultimate guide to bill of materials in fashion — Techpacker