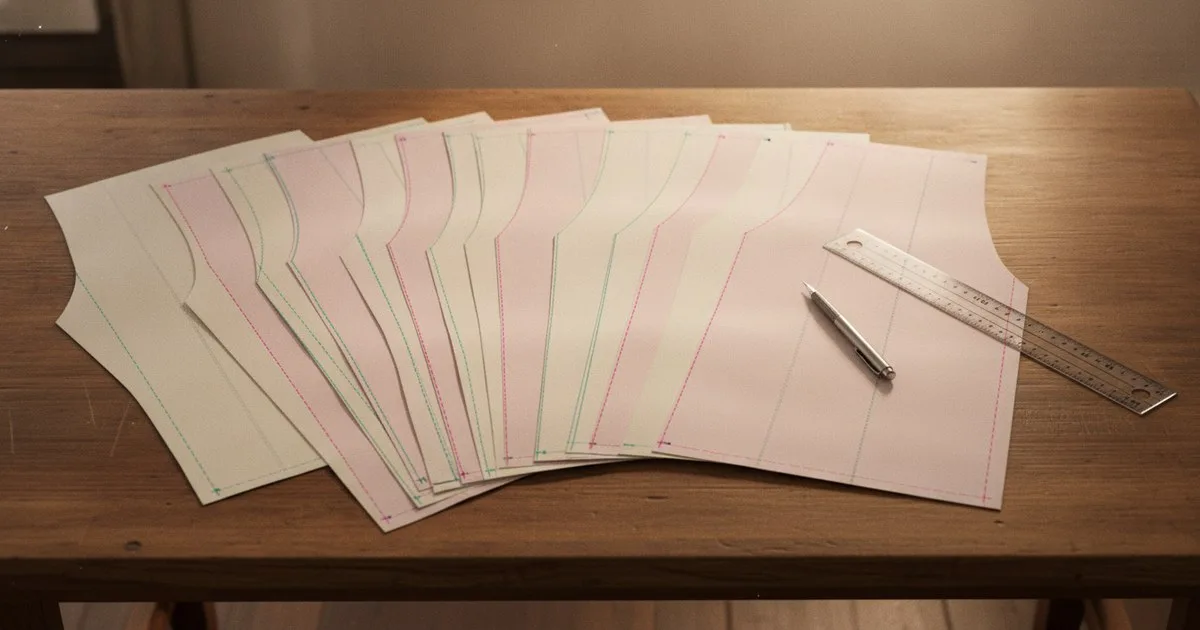
Pattern grading is the process of scaling a base-size pattern up and down across your full size run. Done well, it keeps proportions consistent, reduces fit rejects from the factory, and produces a clean set of DXF files every CMT or cut-and-sew facility can read without rework. This primer walks you through the process from first principles to final handoff.
Key takeaways
- Grade points sit at the perimeter of each pattern piece; moving them by precise increments is what drives accurate sizing across the run.
- Your grade rules must be locked before you touch the CAD software — changing them mid-process forces you to re-grade every piece.
- A validated nest (all sizes overlaid) catches proportion drift before the DXF leaves your desk, not after samples come back wrong.
- Body measurement standards such as ASTM D5585 give you a defensible starting point for increment calculations on women's missy sizing.
- DXF interchange conventions — including grade rule table formats — are defined in ASTM D6673, the standard practice for sewn-products pattern data exchange.
What you need before you start
- A finalised, approved base-size pattern (all seam allowances added, notches placed, grain lines confirmed)
- A size specification chart listing finished garment measurements for every size in the run
- Body measurement data or a recognised size standard to anchor your increments
- A grade rule table — either brand-standard or built from scratch for this style
- CAD software capable of grading and DXF export (see the tool notes below)
- The factory's DXF specification sheet, including any layer-naming or scale conventions they require
Before you open the software: Confirm with your tech pack team that the base-size spec has been signed off. Grading an unapproved pattern multiplies every error across the size run.
Why grading accuracy matters in production
Research into apparel pattern grading consistently identifies the same failure modes: incorrect grade point placement, inconsistent increment values between pieces, and grade rules that were not checked against actual body measurement data. The result is a size run where the silhouette drifts — a size 14 that fits correctly but a size 18 that pulls across the back, or a size 6 with a sleeve that is proportionally too short. These problems are expensive to catch at the fit-sample stage and nearly invisible in a flat DXF until a human puts the garment on.
Getting the process right at your desk is always cheaper than a fit reject from the factory.
Step 1 — Define your size range and choose a base size
Action: Confirm the full size run with your merchandising or product team, then select the base size from which you will grade up and down.
The base size is typically the middle of the run (for example, a size 10 in a 4–18 range, or a Medium in an XS–XXL range). Grading from the middle reduces cumulative error at the extremes. Write the base size into your grade rule table header so there is no ambiguity later.
Expected result: A single confirmed base size, documented in your grade rule table and cross-referenced to the approved tech pack.
Step 2 — Build your grade rule table
Action: For each pattern piece, list every grade point and the X/Y increment it moves between adjacent sizes.
Grade points — also called cardinal points — sit at the perimeter of the pattern piece at seams, notches, and corners. Each point gets its own row in the grade rule table, with a positive or negative value in X (horizontal) and Y (vertical). Increments are derived from the difference in finished garment measurements between sizes, divided by the number of seams that share that measurement. For women's missy sizing, ASTM D5585 provides body measurement tables you can use as a baseline when developing your increments.
Keep your table in a format your CAD system can import. ASTM D6673 defines a standard data format for grade rule table exchange between CAD systems, which is worth referencing if you are working across multiple platforms or handing off to a vendor with different software.
Common mistake: Splitting a chest increment across four seams but forgetting to account for the back yoke seam. Always trace the measurement path on the pattern before you assign increments.
Expected result: A complete grade rule table with X/Y values for every grade point on every pattern piece, ready to import or key in.
Step 3 — Place grade points in your CAD software
Action: Open your base-size pattern in your CAD system and assign each grade point the values from your rule table.
In Gerber AccuMark (now part of Lectra), grade points are assigned through the Grade Rule Table editor; you can import a rule table directly or key values point by point. Optitex — which operates as part of FOG Software Group — lets you assign grade rules in its 2D pattern environment and preview the graded nest in real time. TUKAcad from Tukatech offers a similar workflow with its grading module, including automatic grade point propagation along straight seam segments.
Work piece by piece in a consistent order — for example, bodice front, bodice back, sleeve, collar — so you can check your progress systematically rather than hunting for missed points later.
Tip: Use your software's "show grade nest" view after each piece to catch obvious errors before moving on. A grade point that moves in the wrong direction shows up immediately as a crossing line in the nest.
Expected result: Every grade point on every piece assigned, with the software able to generate a full nested view of all sizes.
Step 4 — Apply the grade and generate the full size run
Action: Run the grade function to produce pattern pieces in every size across the range.
Most CAD systems apply the grade rule table automatically once points are assigned. Review the output size by size, not just the nest. Check that:
- Seam lengths match between joining pieces (for example, side seam of bodice front matches side seam of bodice back) at every size
- Notch positions have graded proportionally, not just moved with the nearest seam end
- Grain lines remain parallel to the original in all sizes
- Any internal details (pocket placement marks, buttonhole positions) have been graded or adjusted to the correct position for each size
Expected result: A complete set of pattern pieces in all sizes, with seam matching confirmed across the run.
Step 5 — Validate the graded nest
Action: Overlay all sizes in a single nest view and check for proportion drift, crossing lines, and silhouette consistency.
A graded nest is your primary quality-control tool. Place all sizes on top of each other, centred on a common reference point (usually the grain line). What you are looking for:
- Even spacing between sizes — increments should look consistent; a sudden jump or compression between two adjacent sizes signals an error in that size's rule values
- Smooth curves — armscye, neckline, and hem curves should flow through all sizes without kinks
- No crossing lines — pieces should nest cleanly; a crossing line means a grade point has moved in the wrong direction
- Proportion check at extremes — compare your smallest and largest sizes against your spec chart measurements to confirm the finished garment dimensions are within tolerance
Print or export the nest and mark it as reviewed before proceeding. Some production teams require a signed-off nest PDF as part of the tech pack documentation.
Expected result: A clean, reviewed nest with no proportion drift, confirmed against the spec chart at both ends of the size run.
Step 6 — Export DXF files to factory specification
Action: Export each graded piece as a DXF file, following the factory's layer and scale requirements.
Before you export, check the factory's DXF spec sheet for:
- Scale: Most factories expect 1:1 (full scale). Confirm the unit (mm or inches).
- Layer naming: Some factories require seam lines, cut lines, and grain lines on separate named layers.
- Piece annotation: Piece name, size label, grain line direction, and number of pieces to cut should be embedded in the file or provided in an accompanying cut sheet.
- Seam allowance: Confirm whether the factory expects patterns with or without seam allowance included. Never assume — this is one of the most common causes of cut errors.
Export one size at a time or as a nested file depending on the factory's workflow. Send a test file for the base size first and ask the factory to confirm they can open and scale it correctly before sending the full run.
Expected result: A complete set of DXF files, confirmed readable by the factory, with all annotation and layer conventions met.
Troubleshooting common grading problems
Seams don't match between joining pieces This almost always means the increment was applied to only one of the two joining seams. Go back to your grade rule table and check that both pieces share the same increment on that seam. Re-grade the affected piece.
Curves look angular or kinked in the nest A kink usually means a grade point was placed at the wrong location on the curve, or the X/Y values are inconsistent with adjacent points. Redistribute the grade points along the curve and check that the direction values follow the curve's natural path.
The size run looks right in CAD but the factory reports fit issues Check whether your increments were derived from body measurements or finished garment measurements. If you used body measurements without adding ease, the pattern will be too tight at larger sizes. Also confirm that the DXF was exported at the correct scale — a unit mismatch (mm vs inches) produces a pattern that is either 25.4 times too large or too small.
Grade points moved but the piece shape looks identical across sizes You may have applied the grade to the rule table without linking the table to the pattern pieces. Check the software's grade assignment dialogue to confirm each point is referencing a rule, not a zero-increment placeholder.
The nest shows crossing lines at the extreme sizes This typically means the increment direction is reversed at one or more points. Revisit the sign convention (positive vs negative X/Y) for those points in your rule table.
What success looks like
When the grading process is complete and correct, you have:
- A grade rule table that is documented, version-controlled, and stored with the tech pack
- A signed-off nest PDF showing clean, evenly spaced sizes with no crossing lines
- DXF files in every size, confirmed readable by the factory at the correct scale
- Seam matching verified across all joining pieces at every size
- Finished garment measurements at the extremes of the size run within tolerance of the spec chart
A well-graded pattern set reduces fit-sample iterations, cuts fabric waste from mis-cut pieces, and gives the factory everything it needs to produce consistently across the run.
FAQ
What is a grade point in pattern making? A grade point (also called a cardinal point) is a specific location on the perimeter of a pattern piece — at a seam, corner, or notch — that moves by a defined X/Y increment when the pattern is scaled to a different size. Placing them correctly is the foundation of accurate grading.
How do I calculate grading increments for apparel? Start from the difference in finished garment measurements between adjacent sizes, then distribute that difference across the seams that contribute to each measurement. Body measurement standards give you a reference baseline; your brand's fit standards and ease allowances determine the final values.
How many grade points does a typical pattern piece need? It depends on the piece's complexity. A simple bodice front might need eight to twelve grade points; a tailored sleeve with a vent could need twenty or more. Every point where the silhouette changes direction or a seam begins and ends is a candidate for a grade point.
What is a graded nest and why do I need one? A graded nest is an overlay of all sizes in a pattern piece, aligned on a common reference. It lets you see proportion drift, uneven spacing, and curve inconsistencies across the run at a glance — problems that are invisible when you look at one size at a time.
Can I use the same grade rules for every style? Not reliably. Grade rules depend on the silhouette, the position of seams, and the ease built into the pattern. A fitted sheath dress and a relaxed shirt in the same size range will have different increment distributions even if the body measurement differences are identical. Build style-specific rules, or at minimum validate a shared rule table against each new silhouette before production.
Further reading
- Assessment of the Factors Affecting Apparel Pattern Grading Accuracy (Tekstilec)
- ASTM D5585 — Standard Tables of Body Measurements for Adult Female Misses
- ASTM D6673 — Standard Practice for Sewn Products Pattern Data Interchange